Showing posts with label DIY. Show all posts

Sunday, June 10, 2012

I COPY VERY WELL!

But Mom, Everybody's Doing It!
Well, you might have known,
I jumped off the bridge!
I did what everyone else is doing,
I made a flowerpot wreath.
I had pinned this to  My Pinterest
a couple of months ago,
via Bees Knees Bungalow's photo from
Bachman's 2011 Spring Ideas House.
This was one of the cutest things 
I had seen in the longest time.

It seems to have taken blogland by storm.
Everyone has a slightly different version
therefore making it their own.
When visiting my daughter, Hollie, in Nashville
we decided to make our version.
Our goal was to make it big enough to make a statement without the wreath being too heavy. We used the fourteen inch wreath forms, thinking this would give us plenty of places to wire the pots.
Being from Savannah, we just had to use Spanish Moss. However, I rarely use the moss that is all over my trees. If you want to use fresh moss be sure to spray it first and let it set a day or two. We our supplies came from Hobby Lobby.
We had to get someone to open up the packages of pots, take out the broken ones and combine enough good pots for our project. They were nice about doing that (they couldn't sell the packages with the broken ones).
We used two inch and four inch pots. 
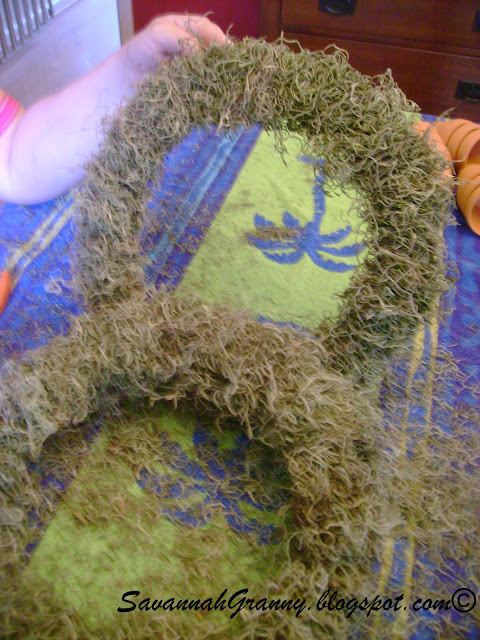
We wrapped the wreaths with the moss. We were generous with the moss as it goes a long way.

We finished wrapping the wreath forms and are ready to wire the pots.
This was the largest wire they had in stock. I would recommend using 22 gauge wire. Remember the higher number the gauge the smaller the wire. I always remind myself,  it sounds bassackwards!
Our flower pots are wired. We wired the larger pots and hot glued the smaller ones. We experimented with different ways to wire. All methods, of course, require going through the hole. 
We did find that we could wire the pots, in a straight forward way, through the hole (from the bottom), out the top and around the wreath.  We would then go in with a second wire, through the hole (from the bottom), loop around the first wire, inside the pot. Bring the second wire back out the hole toward the bottom and wrap/twist both ends around the wreath. This will snug up the pot. You can adjust the position before you tighten the final wire. WHEW!
~~~~~
It was here that we had to part company. Neither of us was sure how we would finish them. We had the hard part done. It was the last day of our visit 
and we did just that, visit.
~~~~~
Meanwhile, back at the ranch, Savannah.
 I found some burlap type ribbon that I had for a long time. I thought it would add to the natural look.
I have never had good luck with herbs and I really didn't want to think about watering these tiny pots in our summer heat. 
So what do I do? I find something blue, faux blue. No it is really blue. I found something blue that was faux. Yep, that's it.
Did I tell you that blue is my favorite color? Four Hundred Sixty Three times? That many?
 I always have blue, faux and stuff around. I found some faux stuff in blue that fit the purpose. 
 I hung the wreath on our screened porch, off the kitchen on one side and the family room on the other.
I think the wreath looks well surrounded by some of Bob's grandfather's tools. The tool at the very top is a curry comb for grooming horses. Directly under the comb is a tobacco punch, used to punch a hole in the ground in which to place the tobacco plant. To the right are sheep shears. Under the wreath is a ladle that we were told was used to melt ammo lead. The hook at the very bottom is a hay hook with a handmade grip.
Yes, that looooong thing is a gourd.
We counted tonight, it is at least forty four years old. It was grown by Bob's dad, in Atlanta. The thing hooked around the bottom is the remnant of a second gourd that had grown around a tree limb but long ago broken. Sigh.


The round gourd was made to be a birdhouse. It is turned around because the birds will tear the screen to get to the gourd. It did happen!
I filled the empty pots with a little moss to cover the wire. After looking at these pics I see more tweaking is in order.
When Hollie sends pictures of her finished wreath I will share with you.
I hope you enjoyed another version of the famed
 "Pot Wreath".

I will be sharing the rest of the porch soon.

I am playing here:
DIY Project Parade
Creative Me

Please leave a comment, I love to read the sound of your voice.

Monday, January 30, 2012

Sunny Window Shelf

Sunny Window Shelf In Laundry Room
While visiting with Debbie 
of DebbieDoos
I was lamenting that I wasn't always
able to complete projects
like I did in my younger days.
Please notice my signature blue. It is everywhere!
I therefore didn't have much to share
with you younger bloggers.
Can you believe the difference in the lighting? All the pics were taken at the same time,
just different angles.
Debbie suggested that I share some of the projects
I have done in the past.
I wanted shelving
 in front of this laundry room window.
 It gets the morning light and is so nice for plants.
Does anyone remember Christopher Lowell?
He was a pioneer of the DIY home decorating shows.
On one episode he did this neat little shelf.
Little to no construction.
A wooden rod with deep brackets to give clearance for the shelf. Two laminated shelves in standard size. Marine cord/rope and a paddle drill bit.
The canisters made by my daughter Hollie hold various things used in the laundry. This one has scrubbies and brushes another holds vinyl gloves, another buttons and coins.
The Most difficult part was measuring for the shelves. I placed the rope over the rod, marked the first shelf, used large safety pins to mark where the top shelf would go. Using the top of the washer and dryer for work space.  I tied the first shelf in place, looped it over the rod again and repeated the process. I then trimmed the rope at the bottom.
Leaky containers created a little "shabby chic" over the years.
My choice of laminate probably wasn't the best for keeping plants but I have learned that shabby isn't
shabby, it's Shabby Chic!
Hey! I bet you could use pallet wood for shelves!
I am not ready to show you the rest of the laundry room, BUT you can see the ceiling. Fancy crown and moulding for a laundry room, huh!
I came to the building site one day and it was up. Not intended but cheaper than taking it down. 
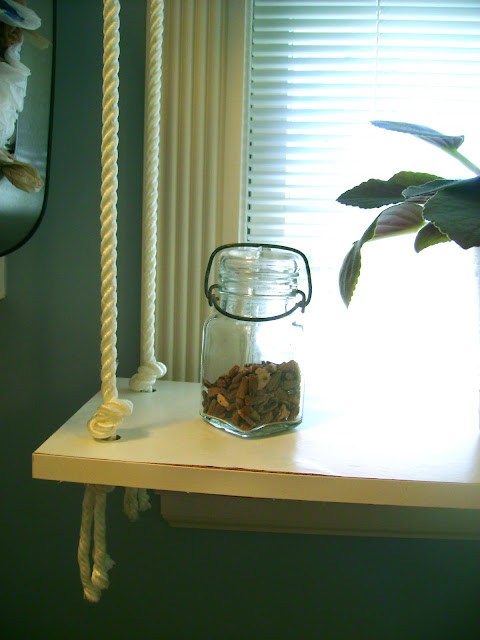
The little glass jars contain seeds for spring planting.
I can't leave without remarking about "Billy Bass".
He was a gift to Bob from one of the grandsons.
This is the room I have chosen for it's display.
The grandsons are grown but they never fail to activate
Billy's song on their way thru to the garage.
Never let it be said that I don't appreciate fine art!


Well, it was a while back 
but I hope you enjoyed seeing this project. 


I love my sunny window shelf!
It makes one a sunny self!
Let's party here:

Tuesday, September 27, 2011

I GIVE UP, IT'S FALL!!


There is no sight of fall color
within seventy-five miles!!
But I am loving all the fall color in blog land.
You have dragged me kicking and screaming
but I give up!!

It was ninety degrees here today but FALL is really HERE!
I see it in beautiful examples all over blog land.

I decided if I didn't get started I would never get to the finish line...Thanksgiving. This afternoon I sat down with some boxes from the guestroom closet (I'll have to show it to you, someday. It is really scary. Maybe for Halloween!).
 This urn was sitting in the garage, partially painted silver. I didn't like how it was turning out so I just quit. I had some aged iron spray paint and thought that would be good for fall.
 You can just barely make out the grape design .
I already had everything except these little pumpkin thingies and some small scented pine cones that I purchased recently.


It was extremely difficult to position the green pumpkin. It is very irregularly shaped, just like a real pumpkin. I finally decided to go with the flow and get the best overall fit.
 This is what usually resides in the foyer. I thought this would be a good place for my first "Pumpkin Topiary".


Whew! I'm in... the season. As has oft been said   Happy Fall Y'all!!
I'm working on more fall decor to show you soon.


If you enjoyed your visit please leave a comment.
If you didn't, leave one anyway. Might make you feel better.

Sure makes me happy!


I am joining these lively parties, won't you come along.


Monday, September 26, 2011

THRIFT STORE PUMPKINS?

Modern look pumpkin!
My daughter, Kim, picked up orange colored garments at GW and created some pumpkins for her Fall decor. 
They were having a clothing sale, everything that fits in one bag for $2.00. She went through and bought all the orange.
The one above was made from a colorful scarf and is one of my favorites.
I think this one is a man's polo type shirt.
She sent these pics from her phone and they are varying sizes.
This appears to be a man's sport shirt.
Kim did tell me this one is very large!

I Think this one is a woman's dress.


She gathered the fabric, with a rubber band or decorative fabric scraps, around sticks for the stems. They are filled out with plastic bags.

I think these turned out great. What do you think. 
Easy peasy, yes!

I will post an update when I see how she displays these.

Joining these great parties today, come along.

Friday, January 28, 2011

WANT EXTRA CABINET SPACE?

YOU ALREADY HAVE IT!!
I'LL SHOW YOU WHERE!

This project was necessitated by the
"Twelve Days of Christmas" gifts
that I shared with you herehere and here.
I desperately needed extra storage.
The week after Christmas Sweet Old Bob helped me execute this project. He was the sawyer.

If you have 36 inch upper cabinets you normally have two shelves. If you have 42 inch cabinets you probably have three. This gives you three or four existing shelf surfaces. You can get at least one extra shelf out of each cabinet, possibly two, with a little planning.
If your cabinets allow you to adjust your shelves, most do, you are good to go. 
First you need some sort of shelving material. A 12 x 1/2 inch stock board is ideal. I already had some 3/4 inch oak plywood scraps so I used that. 
Before cutting, it is a good idea to empty the cabinet. You can use one of the existing shelves to get perfect measurements and this makes getting the new shelf in place with ease. If you need to buy shelving material take your measurements with you. Most home improvement stores will make all the cuts you want.
 Since I used plywood I had a striated edge I needed to cover.

I purchased this veneer edging at Home Depot for about $6.00. It is enough veneer to do my cabinets and every cabinet in blogland. 
Just cut the veneer with an extra inch at each end. Apply according to instructions with a regular iron. I waited a few minutes for it to cool. I then lightly sanded the edges. 
If you use 12 x 1/2 inch plain stock you can skip the previous step(s).
Add a bit of stain to match your cabinets. You probably have some on hand. You can combine stains to achieve the right shade. I only stained the edge.
Isn't that cute. Perhaps a sign of days to come!
Now rearrange the shelves to suit you needs.
Add your extra shelf or shelves.


Congratulations!
 You have just found 25 to 33 percent extra shelf space in each cabinet in your kitchen.

The bottom shelves are the ones I added.
Remember, if you use solid stock the veneer is unnecessary. That would save a lot of time. I already had plywood and I am really cheap. 
After resting a bit, I will be doing every cabinet in my kitchen. Just think how much room I will have for more dishes.
I am linking to the following gracious hostesses. Please link back to them for more inspirational posts.


Hugs, Ginger


Related Posts Plugin for WordPress, Blogger...